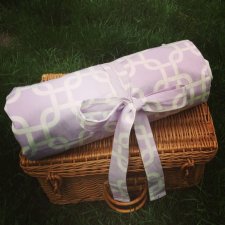
| - Click Image to Enlarge - | |
 |
FREE Tutorial: The Perfect Picnic Blanket by Alanna
Tired of having your favorite blanket soak through from a wet ground spot during a picnic? Or perhaps you're tired of cleaning up stains from inevitable spills? Look no further; Alanna of Toronto Mama has put together a nice tutorial that will walk you through the steps to creating a perfect waterproof picnic blanket! More from Alanna:
"I have been on a hunt for some time now for the perfect picnic blanket. In order to obtain "perfect" status, said blanket would have to meet the following criteria: It had to be huge...the bigger the better, machine washable (obvi.), waterproof and easy to store.
"Last summer I picked up this beautiful Liliac Edison fabric at Tonic Living to make some Roman shades for my bedroom. I changed my mind at the last minute and thus had three metres of this gorgeous fabric at my disposal. I patched together pieces of polyester and acrylic blackout liner to make the waterproof backing for the blanket. I recommend using oilcloth, vinyl or an outdoor tablecloth to make your blanket waterproof. PUL fabric would also work, but is considerably more expensive."
Visit the Website: Toronto Mama
Do you like this tutorial? If so, click the Like button below:
What do you think of this tutorial?


